Today I have a tutorial for you to make a fantastic card in a box using Santa stache
Items needed
Santa’s stache
stamp set
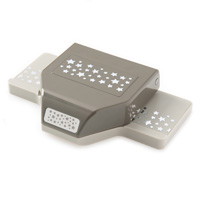
Mustache framelit
Stars framelit
Beautifully
baroque embossing folder
Cherry cobbler –
stampin` blendabilities
Whisper white
cardstock
A4 Cherry cobbler
cardstock
A4 sheet of Early
espresso cardstock
Glimmer paper –
dazzling diamonds
Cherry cobbler
inkpad
Memento ink
Crisp
Cantaloupe ink
Aqua painter
Tombo and/or red tape
Stampin dimensionals
To make the box take
a piece of A4 early espresso card stock and score at 7cm, 14cm, 21cm and 28cm
down the long side.
Then turn it 90
degrees and score at 7cm on the short side too.
Cut along the 4 score
lines up to where it meets the 7cm score line that runs horizontally.
Then on the end
piece (the flap) where it`s narrower, cut across from the score line so there
is only a lower flap. Then using a piece of red tape along the flap put the box
together.
Cut the following from
cherry cobbler card and emboss with the beautifully baroque embossing folder.
3 panels 13 x 6cm, 3
panels 6 x 6cm and 1 panel 6 x 20cm. Then using off cuts cut two
pieces 1.5cm by 9cm and score at 1cm each end as per photo.
Using tombo glue,
stick the pieces inside the box below the top edge of the box, so you won`t see
it later.
Then stick an
embossed panel on each of the side panels, front and the tall piece of the box
facing you. Then cut a piece of whisper white card 21 x 6cm and stick on the
rear, so that a greeting can be written here.
Stamp 3 Santa’s
using memento ink on to whisper white card and colour in using cherry cobbler
blendabilities (I used the light and medium) I then coloured the face using the
aqua painter and crisp cantaloupe ink, but of course if you had the skin tone
ones you could use them! Then cut out the faces, I know sorry I hate fussy
cutting too L
Then use the mustache framelit to cut out 3 from
the glimmer paper and stick on with dimensionals. Then attach the Santa’s on to
the box, one on each of the strips and one on the back of the box. If you need
to make one higher then cut a piece of cherry cobbler card to make a body
Stamp in Cherry
cobbler ink the greeting on to whisper white card and cut out using the stars
framelit and stick on to the front flap of the box
Here’s the
finished project, hope you liked it and enjoy giving it a try
,